~/Open WebUI and OpenAI
15 March 2025
I use ChatGPT a lot (as any good information worker should :-s ), but I wanted to use different models and do some experimenting with local models.
Note that although setting up Open WebUI on a local server is free, using OpenAI’s API isn’t, but it should hopefully be cheaper than paying for a ChatGPT subscription, and it’s much more flexible - you can hook it up to Claude or Gemini or local models, although that’s outside the scope of this post.
Recently I watched Network Chuck’s excellent video about Open WebUI and LiteLLM which clued me onto setting up Open WebUI and using OpenAI’s API directly, instead of having to pay $20 USD a month for a paid ChatGPT subscription.
In Network Chuck’s video he sets up Open WebUI and Ollama on a cloud VPS, which I don’t want to do at the moment. I’ve already got a homelab server that I use to locally self-host a number of services, so I went in search of a Docker Compose file that I could use to set up just Open WebUI on that server. Luckily Network Chuck’s second channel has a video where he does just that.
You could do this on any machine that has Docker installed. Here’s the docker-compose.yml file that I used, almost verbatim from Network Chuck’s video:
services:
  openwebui:
    image: ghcr.io/open-webui/open-webui:main
    ports:
      # Change port 3104 to whatever port you need
      - 3104:8080
    volumes:
      - ./data:/app/backend/data
After running docker compose up -d and hitting myserver:3104 I got Open WebUI’s (very pretty) landing page. From there I created my admin account.
The next step is setting up an OpenAI account. Start here: https://platform.openai.com/ and create an account. You can skip a couple of the steps like creating an application.
I added $5 USD to my account, went to Settings, then API keys, and created an API key for Open WebUI.
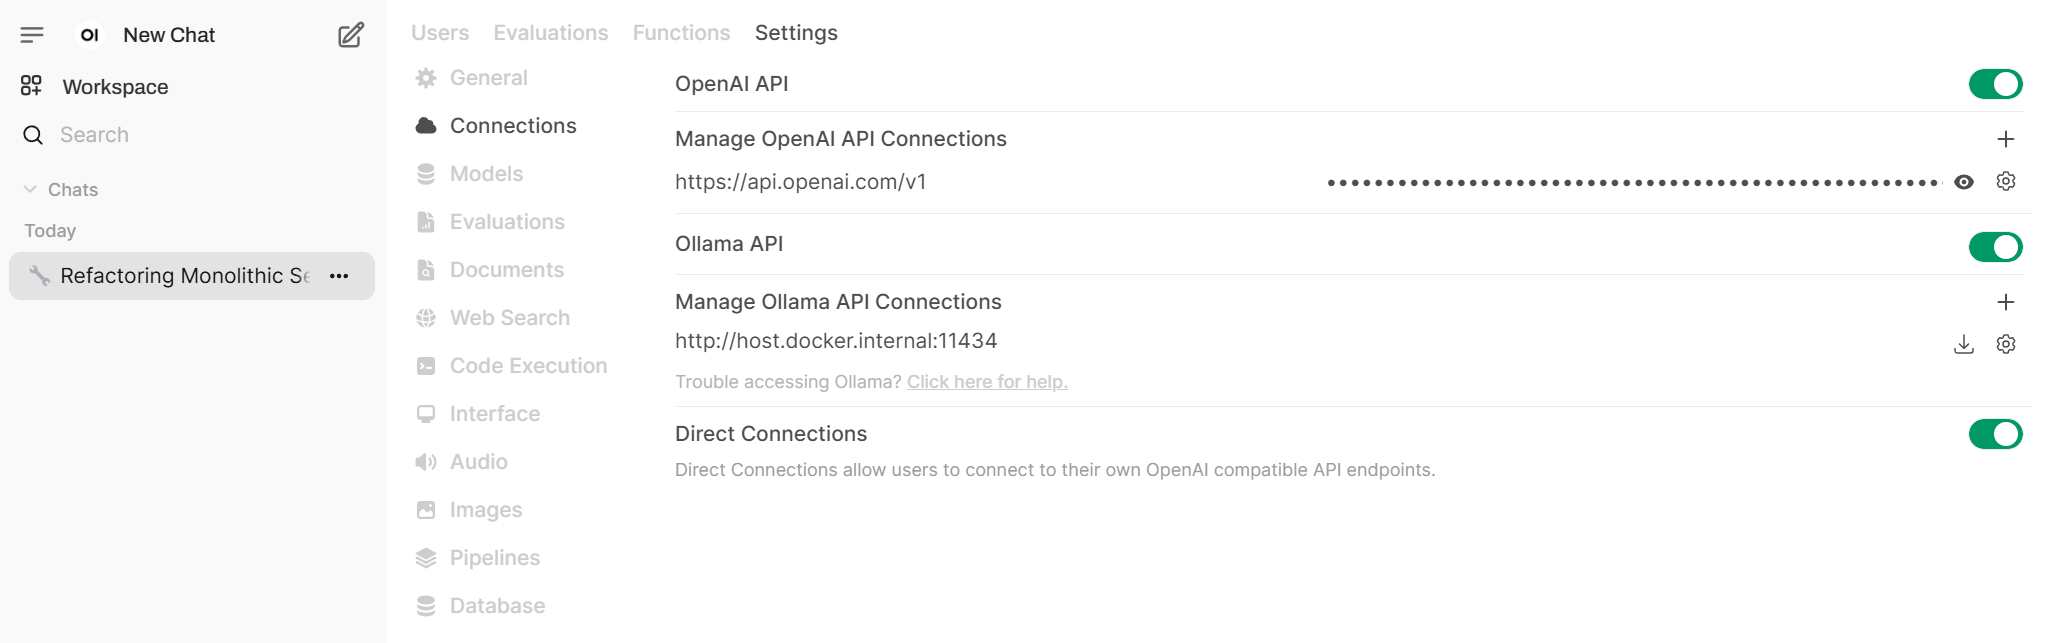
Then back in Open WebUI I went to Settings, Admin Settings, Connections, and then added the API key to the OpenAI API connection, and saved. It ended up looking like this:
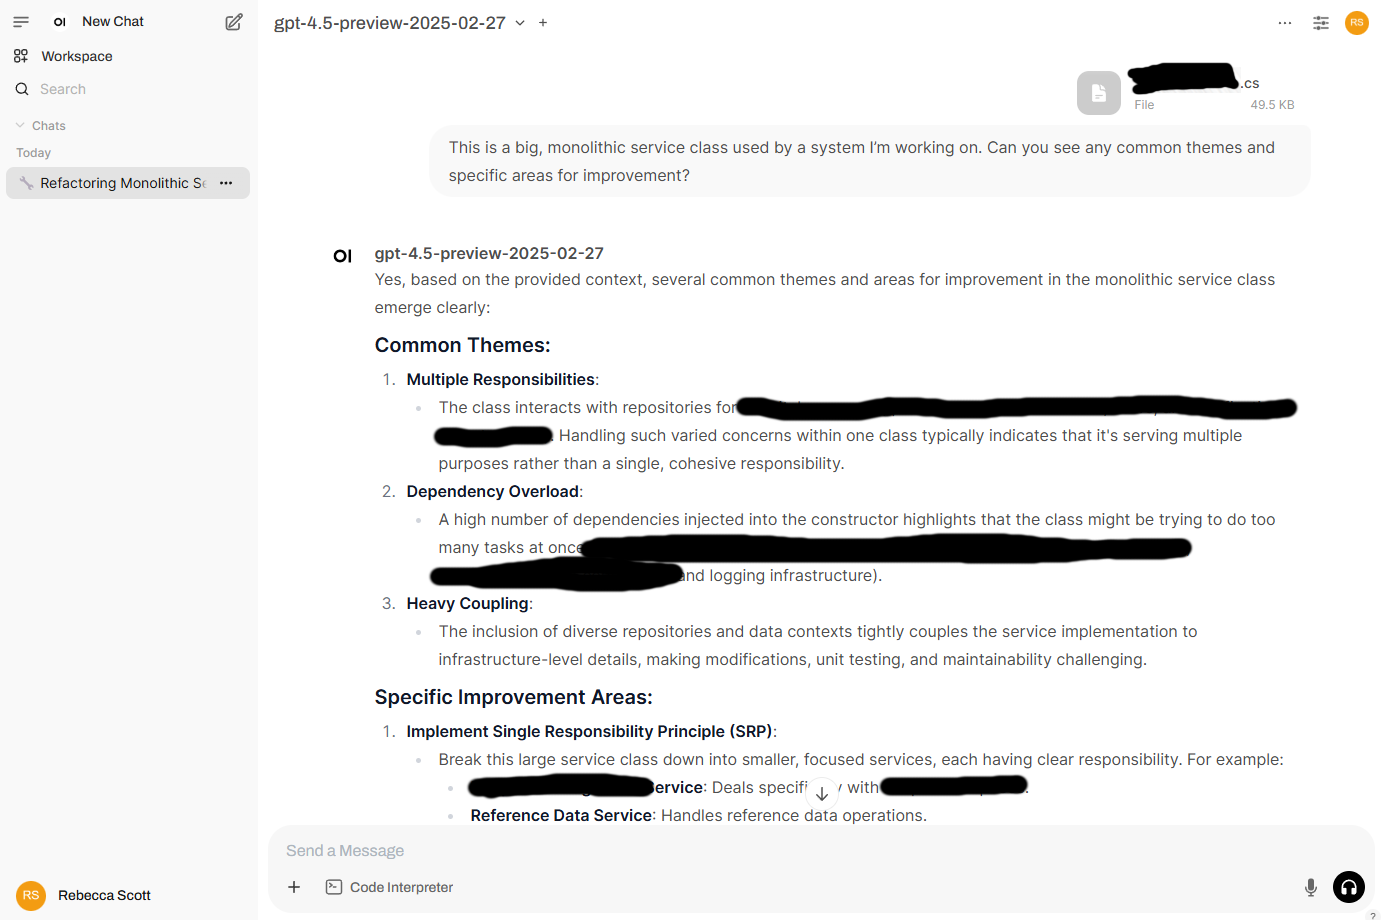
Then I started a chat, picked a model, and gave it a run over a file from a project I work on, to see how well it could analyse the file and give some suggestions for improvement.